

From Drab to Fab: A Bathroom Makeover Journey
This blog post is the first of many where I’m breaking down specific projects we’ve designed. Starting with the design process, through the execution and the final result.
GOALS
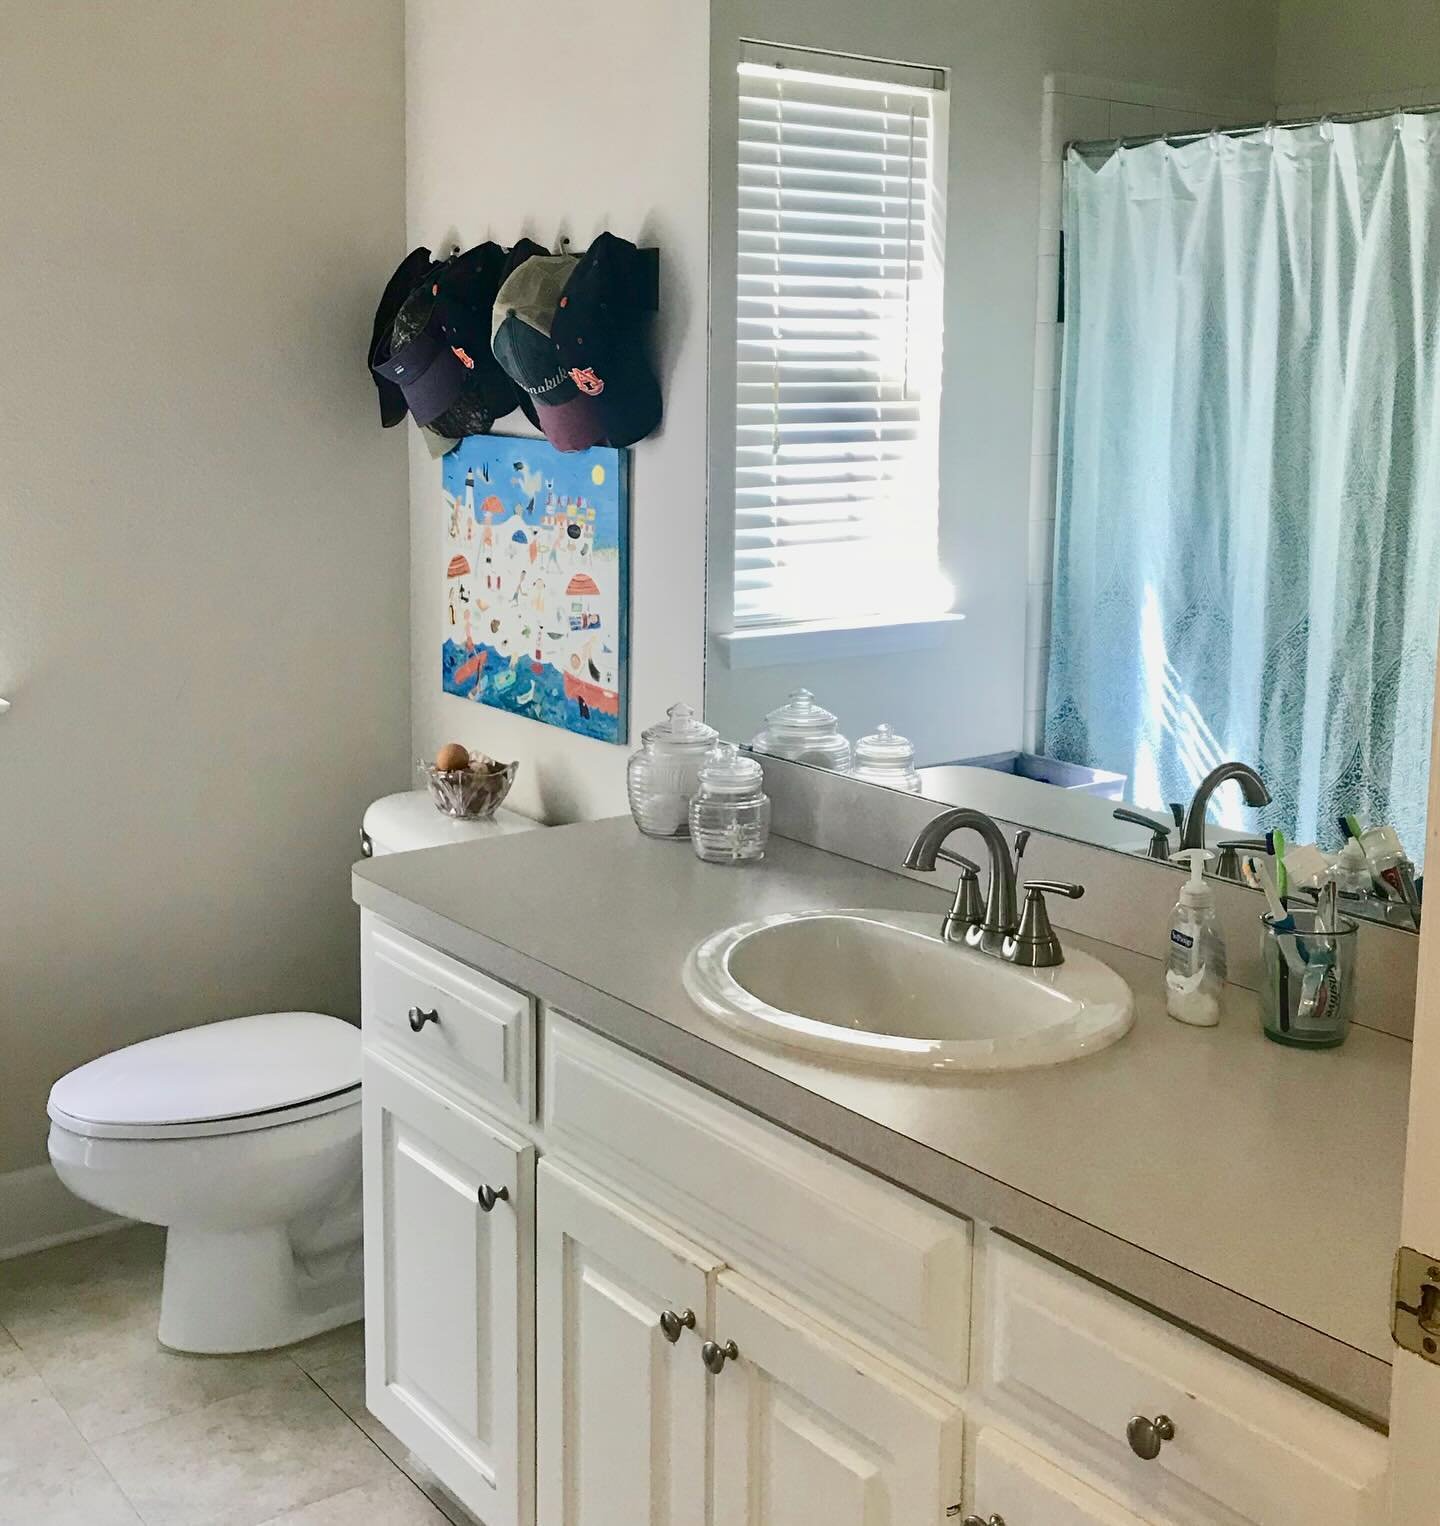
This client needed a budget-friendly and simple design plan for this hall bathroom. She had recently purchased a home and wanted to get started on making it her own right away. It made sense to start with this bathroom since it was strictly a cosmetic makeover that didn’t require making any wall changes.
SCOPE OF WORK
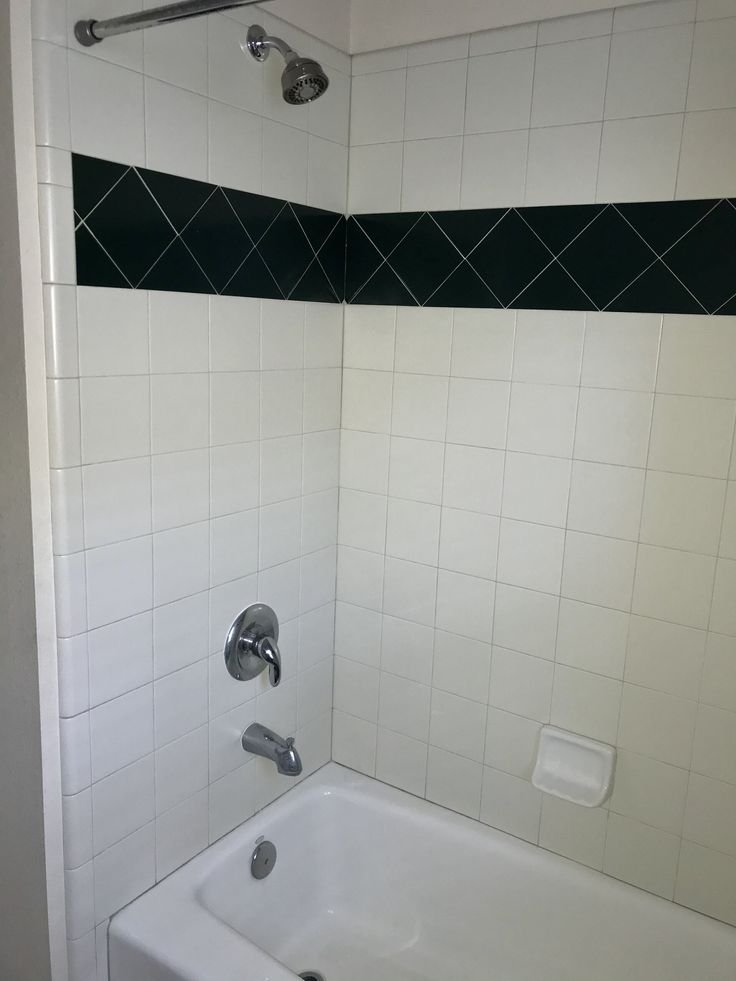
The tub and surround was in great condition. We could definitely work with the white tile and the black accent. Everything else was replaced - flooring, vanity, faucets, toilet, wall covering, lighting, mirror and accessories.
DESIGN CONCEPT
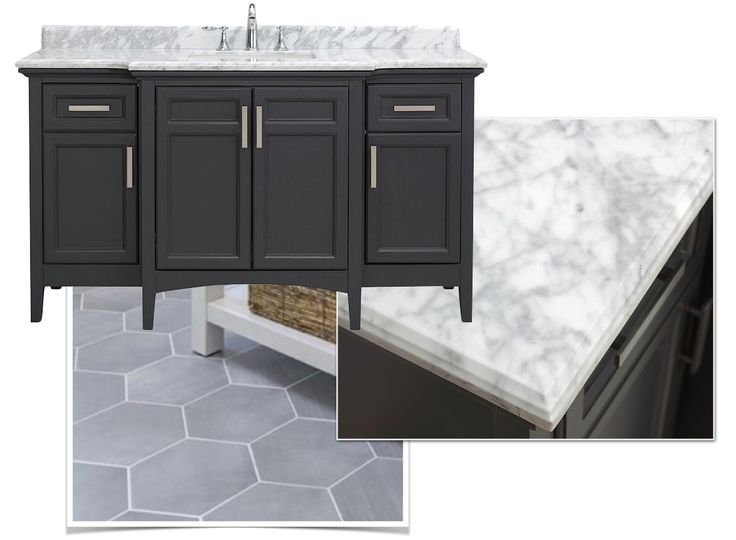
The design concept started with a ready-made vanity cabinet that was not only the right size, it was also on sale. With that purchase, we landed on a gray and white color scheme with black accents. Wallpaper was also part of the design, but the exact pattern was still to be determined.
EXECUTION
The actual construction phase was not very long since all the materials had been ordered and were on site. The old vanity had to be removed, along with the toilet and mirror. Then, the floor tile was laid and new vanity installed. The plumbing work included replacing the trim on the tub to match the new sink faucet. Thankfully, the vanity included a countertop and sink so we didn’t have to wait for that phase of the project. This saved us about two weeks of time. The electrician changed out the light over the vanity as well as the exhaust fan. The ceiling and trim got a fresh coat of paint. Then finally, it was time to get the wallpaper installed. I always recommend installing your wallpaper at the very end to avoid potential damage. From start to finish, the construction phase was only about three weeks.

MATERIALS USED
Vanity with Countertop and Sink: This was not only a budget-friendly option, but also a time saver. The counter material is marble and included a splash for the backside.
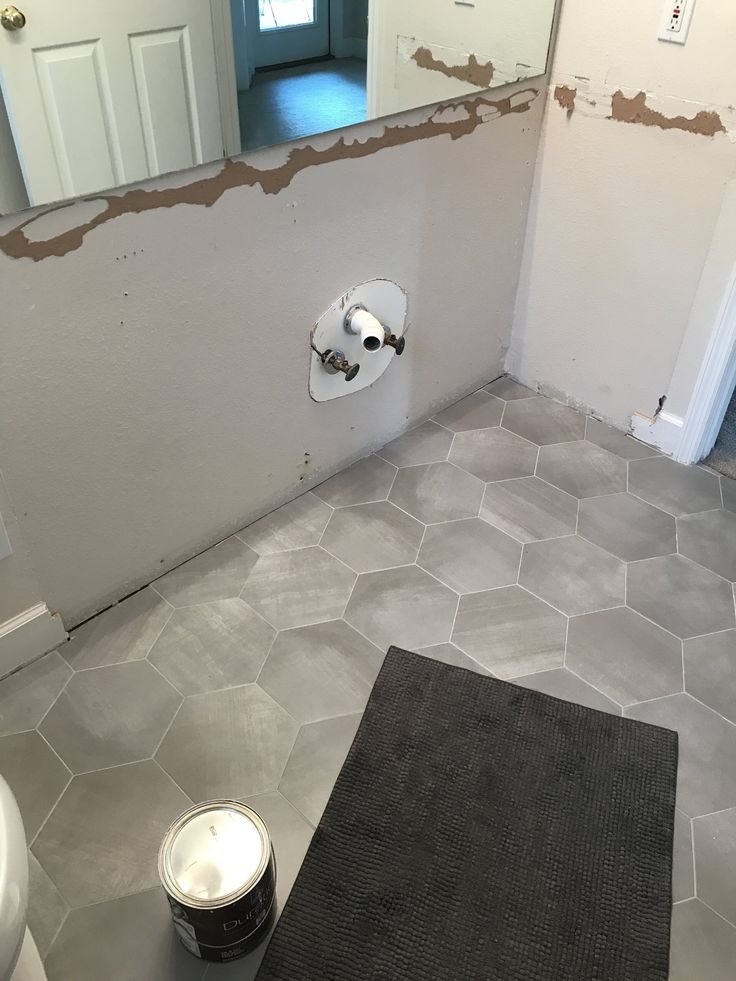
Gray Hexagon Tile: Because this bathroom was used by the client’s son, we wanted something a little darker for the floor to hide dirt. The color variation also helped disguise any messes. I chose a lighter grout for some contrast, but you could have definitely gone a little darker as well.
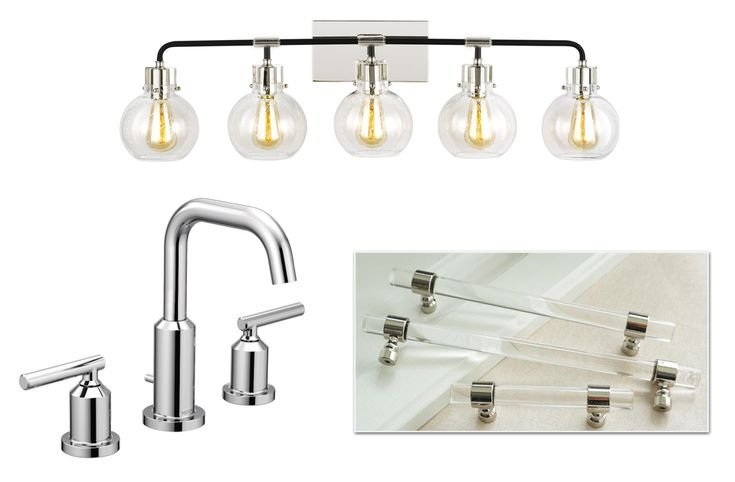
Chrome Plumbing Fixtures: I chose chrome because it’s a timeless finish and it’s budget-friendly. The style is a little more contemporary to work with the design plan.
Vanity Light: Since this was the only light source in the bathroom, I chose one with five light bulbs. I also wanted it to be long so it was in proportion to the length of the vanity. I also loved the combination of chrome and black finishes.
Round Mirror: Having a decorative mirror worked well in this space to give it a little bit of an elevated look.
Wallpaper: I really wanted to use wallpaper to bring in some much needed pattern and this design checked all the boxes. It’s my favorite part of the bathroom.
Bath Accessories: This was the perfect place to bring in a little more black with a towel ring and toilet paper holder.
Cabinet Hardware: The vanity came with some simple pulls, but I wanted to personalize it a little more by replacing them with an acrylic pull. An effective way to add some personality to your cabinet.
Finishing Touches: This phase of the project took the longest but was worth the wait. The shower curtain was created using two ready-made drapery panels and we did a custom roman shade on the window. I loved bringing in the yellow with this and the art.
BUDGET
In full transparency, I’m sharing detailed budget numbers because this bathroom is actually mine. In future posts, I won’t be able to give exact costs as I want to protect my client’s privacy. This renovation was done in 2019 and pricing has increased since then. For example; the vanity was $967 vs. $1367 today, the light fixture was $175 vs. $360 today. My best guess is that this bathroom would be a total of $6,000 if you were to use the same products today.

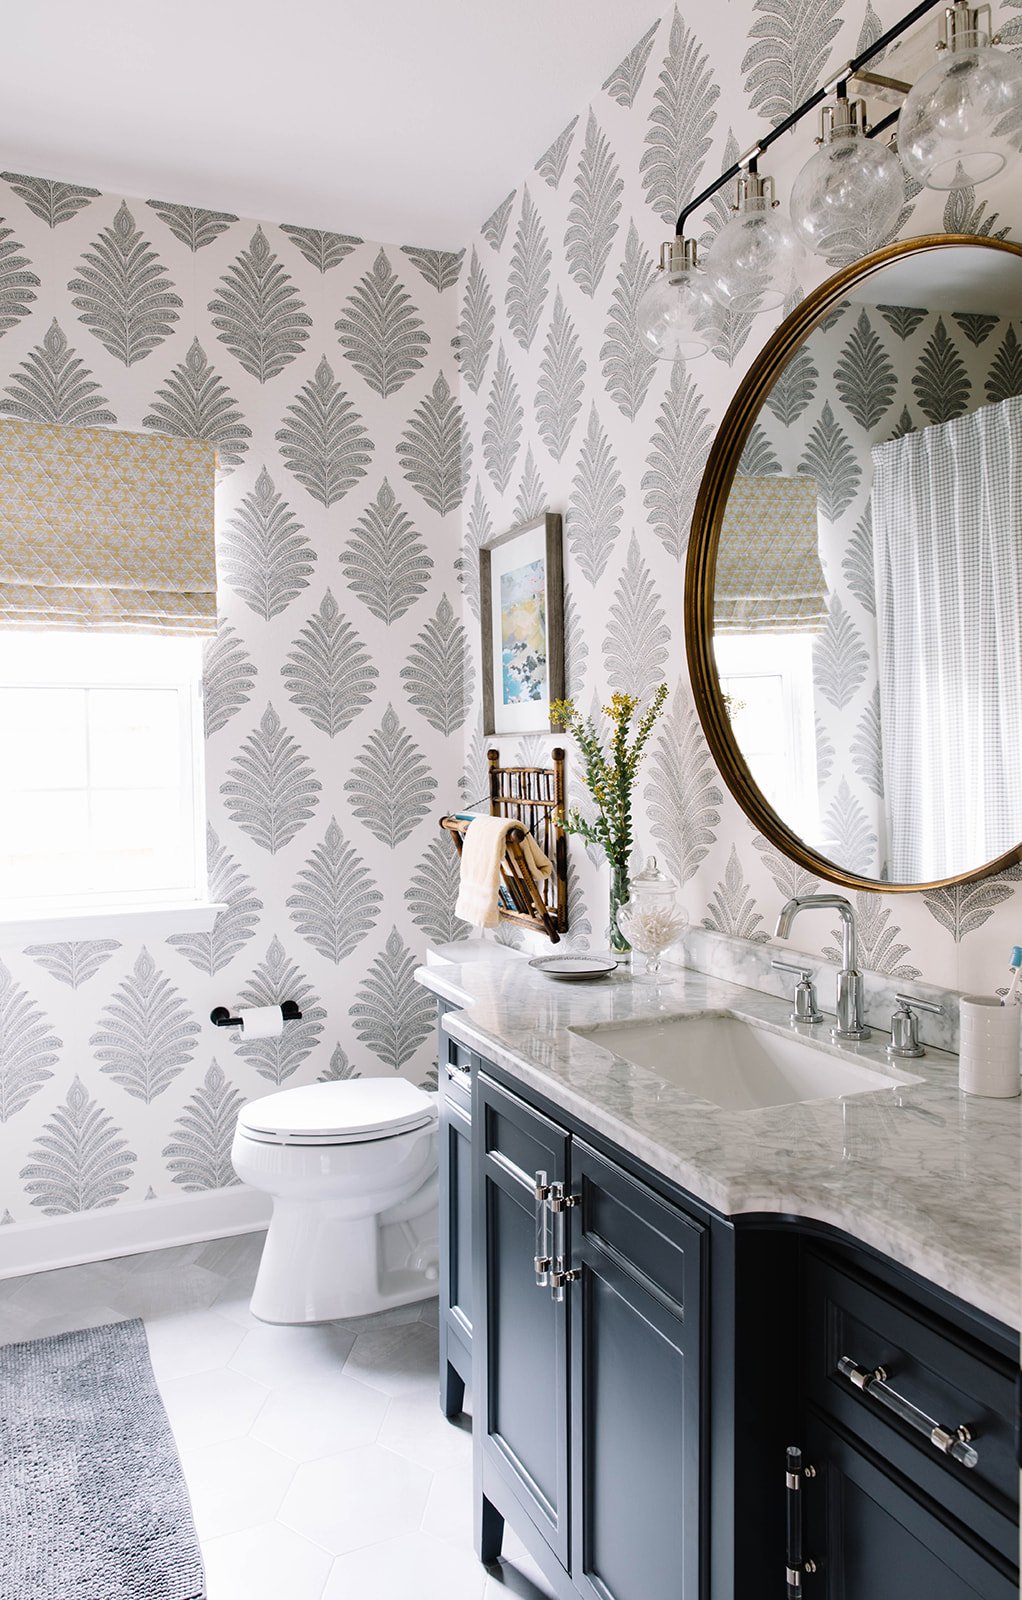
THE FINAL RESULTS
I would consider this project a total success. Not only did we stick to the budget ($5,000), we were able to get it done in less than a month. That was only a result of planning that included scheduling all of the trades before the work started and having ALL the materials on site so there no delays. The biggest challenge was the constant follow-up with all the trades and holding them accountable for not only being there when they said they would, but giving me quality work.
If you are considering a bathroom renovation similar to this one, I highly recommend you checking out my online course “How to Renovate Your Bathroom Like a Pro”. I break down the entire renovation process into five videos you can watch any time. Plus, I give you a workbook where I share calendars and sheets to make your project a success. I also offer a Virtual Consultation service where I can walk you through the steps of your own renovation. Either way, I’d love to help you make your bathroom dreams come true!
Thanks for Reading!
Jennifer